
Welcome to Papercut
Login to Web Interface:
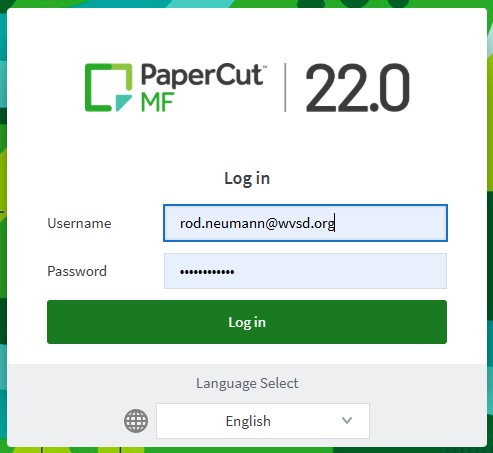
1. Click this Link to open the site.
2. Login with your full district email address and password.
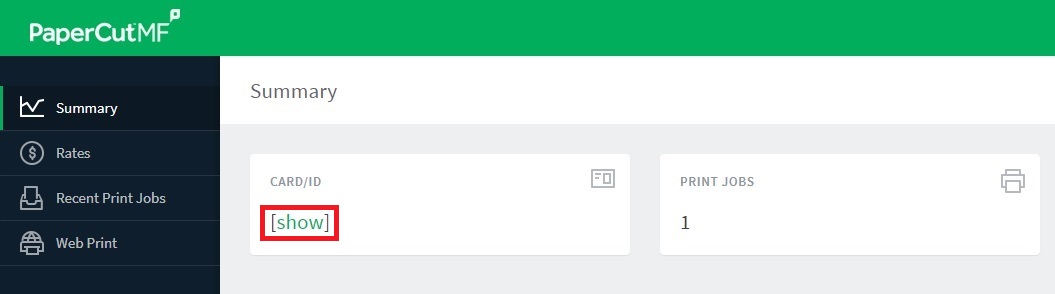
On the "Summary" page, you can see statistics of how much you have printed and if you click "[show]" button on the "CARD/ID" area, it will show what your Employee ID number is. This number is what you will use to login to the copier.
Don't worry about the "Rates" page. Papercut uses this function to do quotas which we aren't implementing at this time.
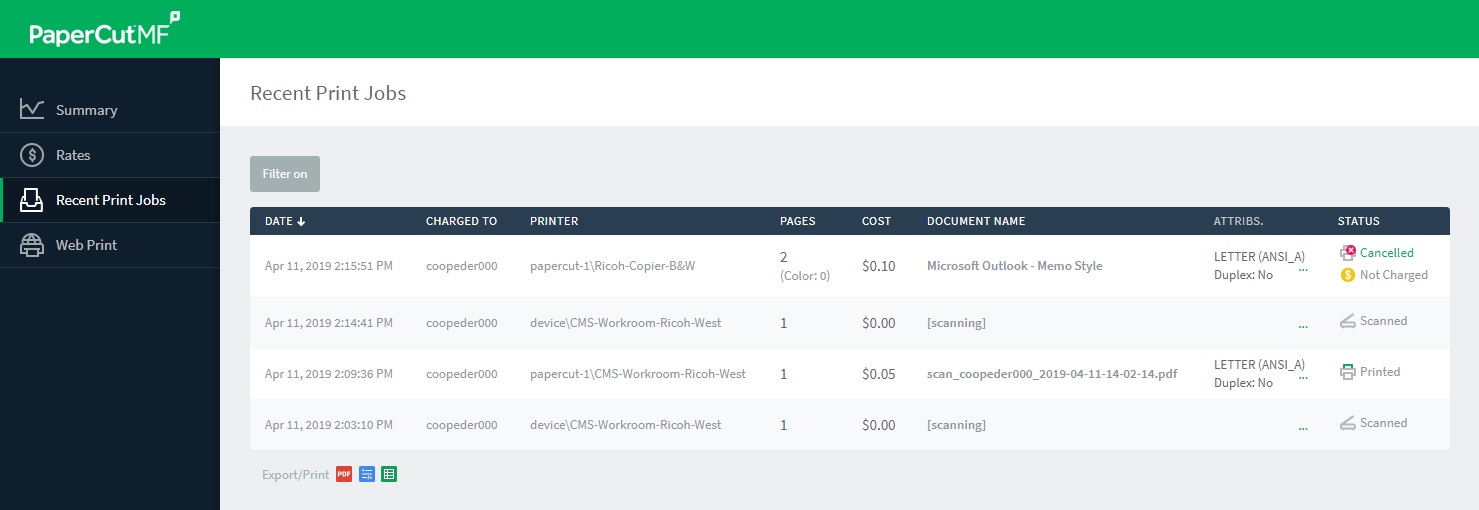
On the "Recent Print Jobs" page, you can see all the recent jobs the server has processed under your account. If you look on the far right side of the job, it shows the status of the job.
The Web Print page is a feature that we will be making available in the near future.
Add a Printer:
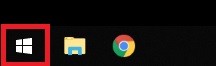
1. Click the Windows Icon in the bottom left side of your screen.
2. Start typing "print".
3. An Icon should be found for "Printers & scanners". Click the Icon or press "Enter" on your Keyboard.

4. Click the button at the top labeled "Add a printer or scanner".

5. Your computer will start scanning the network for all available printers.
6. Once you see the printer you want to connect to, select it and click "Add device".
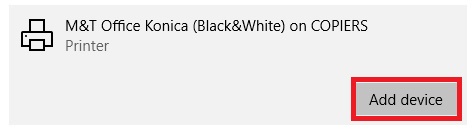
Your computer will now install the printer.
Once the printer is finished installing, you will be able to select it in your other applications you wish to print from. There is no other configuration needed on your computer.
Release Print Jobs:
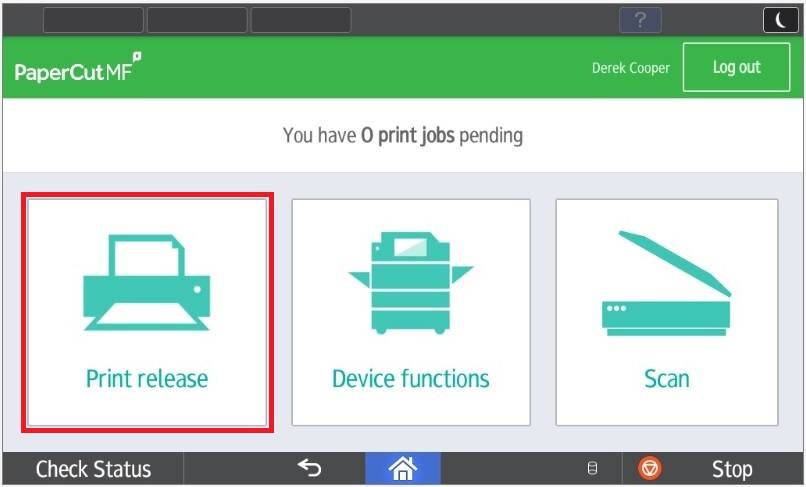
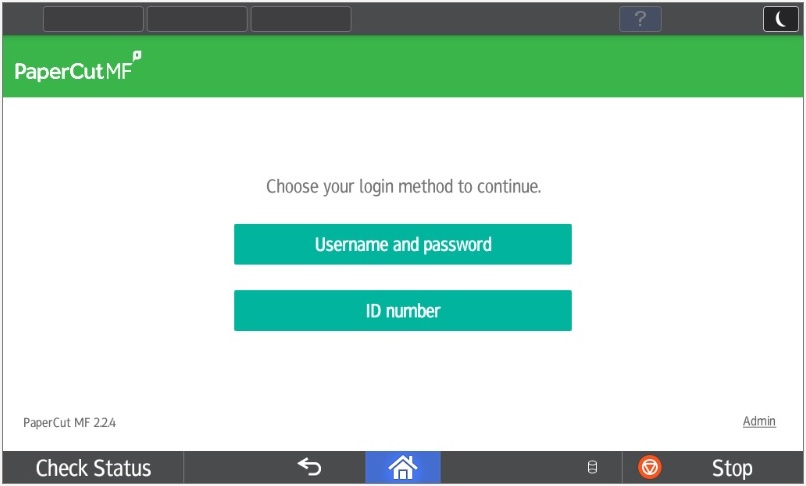
1. Login to the copier with your Username and Password or your Employee ID Number.

2. Press the "Print release" Icon on the left side of the screen.
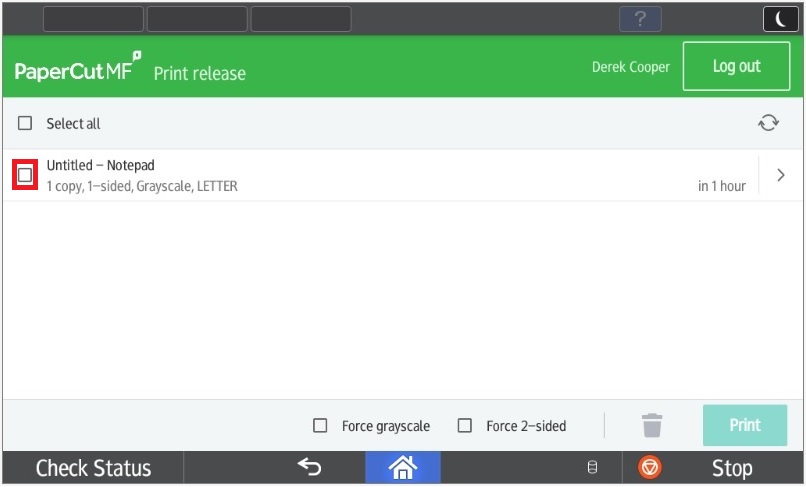
3. Select the job you would like to print.
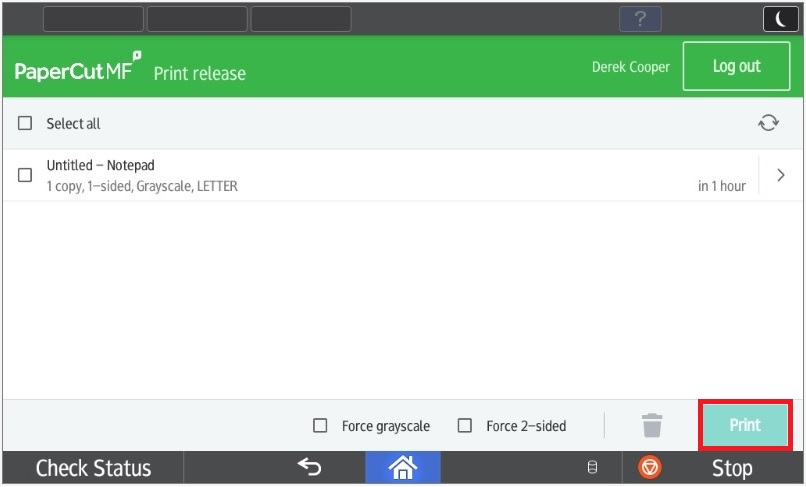
4. Press "Print" in the bottom, right corner of the screen.
Make Copies:
1. Login to the copier with your Username and Password or your Employee ID Number.

2. Press the "Device functions" Icon in the center of the screen.
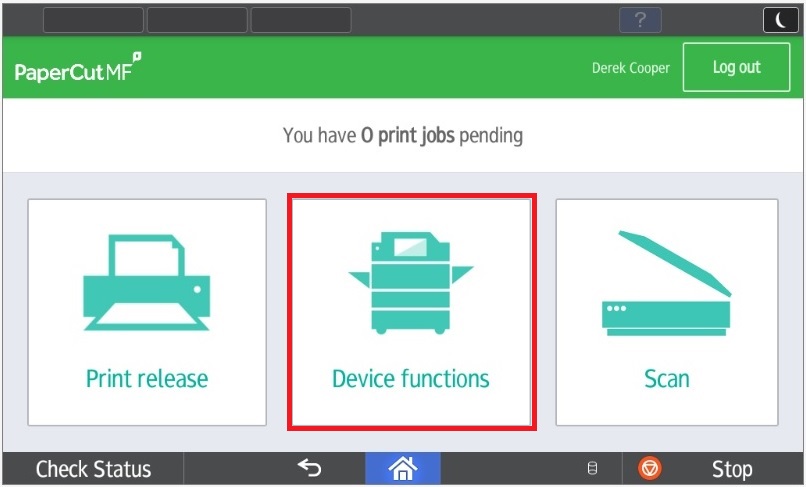
3. Press "Use device functions".
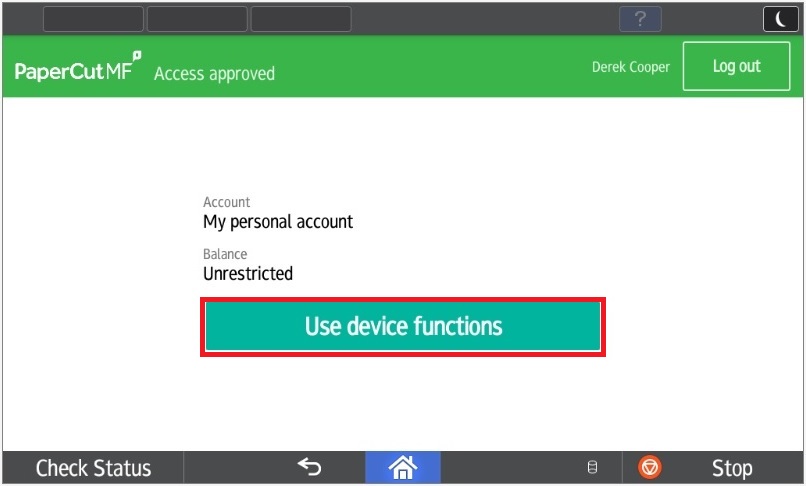
You will then be sent to the following screen where you have some options...
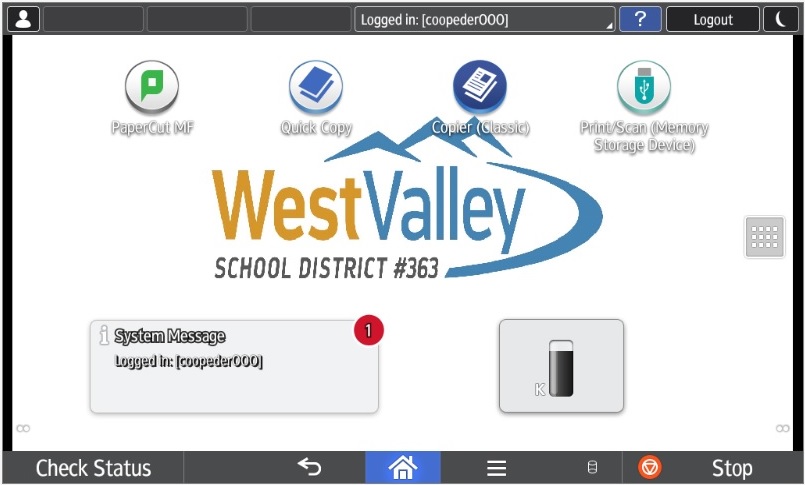
- PaperCut MF - This will send you back to the screen where you can release print jobs or scan.
- Quick Copy - You could use this if you just need to make a copy of a document without making any changes to the way the document looks.
- Copier (Classic) - You could use this if you need access to the advanced settings of the copier. (ex. Single Sided/Double Sided, Paper Dementions or Tray Selection)
- Print/Scan (Memory Storage Device) - To use this, plug a USB drive or a memory card into the Left side of the display and then print your documents directly off the storage device.
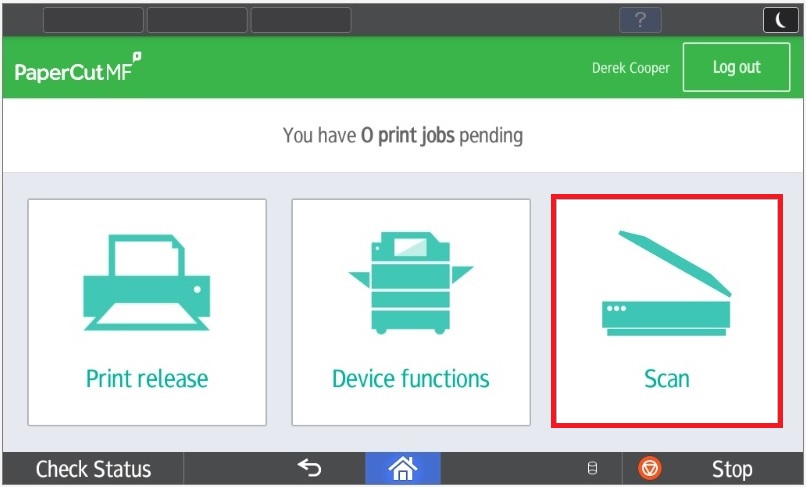
Scan Documents:
With allowing PaperCut to manage our Scan jobs, it gives us the ability to automatically send scans to your email address once you login to the copier.
1. Login to the copier with your Username and Password or your Employee ID Number.
2. Press the "Scan" Icon on the right side of the screen.
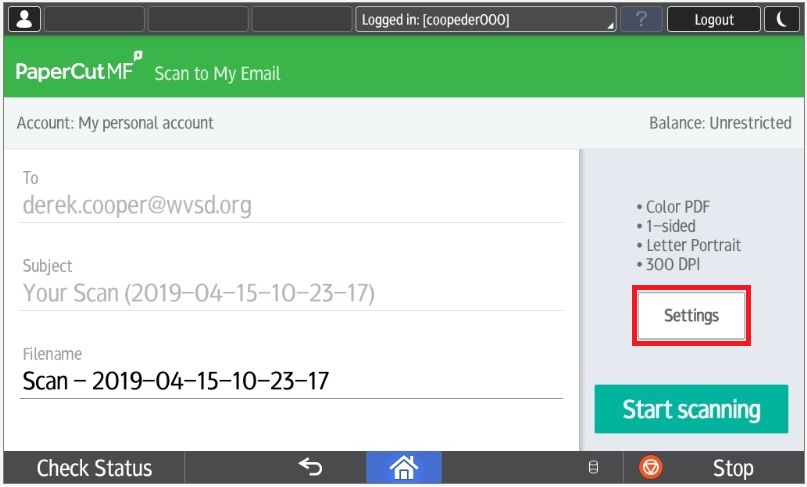
3. Change the "Filename" if you would like or keep it with the default which is the current time.

4. By pressing the "Settings" button, you can change some of the advanced settings of how it scans the document. (ex. PDF for documents or JPG for pictures, Single Sided/Double Sided)
5. Press "Start scanning" to start the job.
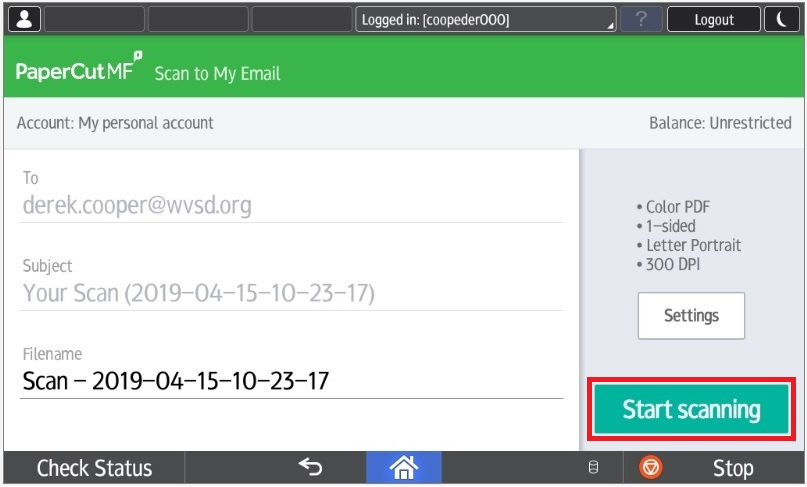
Once you get back to your computer, you should find an email waiting for you in your inbox with the scanned document attached.
Frequently Asked Questions:
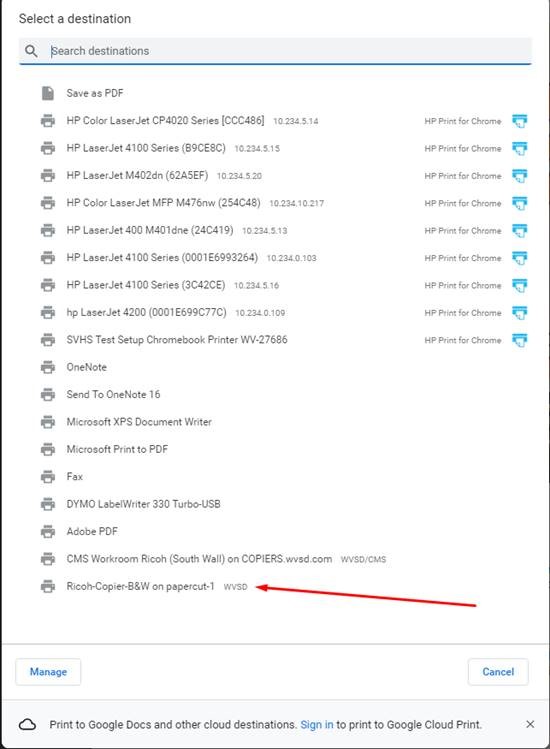
In most cases, you will know the printer is on the new system if it is followed with "on papercut-1".
The new naming convention we have to use with PaperCut goes as follows:
- Ricoh Black and White: {school name}-Ricoh-B&W on papercut-1 (ex. WVHS-Ricoh-B&W on papercut-1)
(Note: This is only for the Chrome browser, not Chromebooks. We currently aren't supporting PaperCut printing on Chromebooks.)
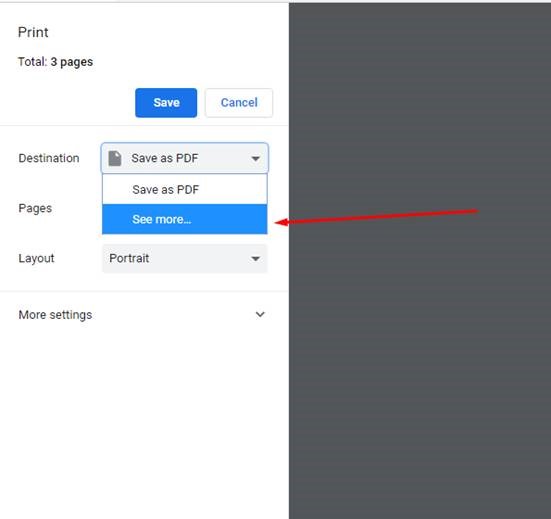
Even though the printer might be installed on your computer, Chrome only displays recently used printers. If you have never printed to a printer, this can be a problem. Follow the steps below to add the printer to Chrome:
1. Click the drop down next to "Destination".
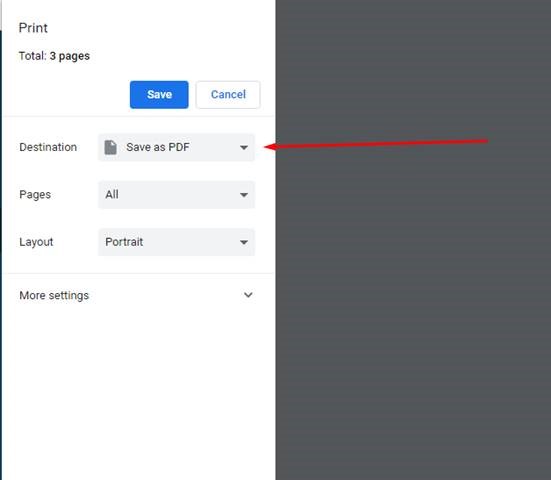
2. Click "See more...".
3. Find the new printer in the list.
Print jobs will stay in the hold queue for 10 hours after they are printed. At that point, the server will assume you didn't want to print the document and delete it.